Instant Pot Applesauce (+ Slow Cooker) đźŤŽ

Fall is here, and that means one thing—apple season! 🍂 Whether you’ve been apple picking at a local orchard, brought home a big bag from the farmers’ market, or just grabbed a mix from the grocery store, this is the perfect time to turn those crisp apples into something warm, cozy, and delicious.

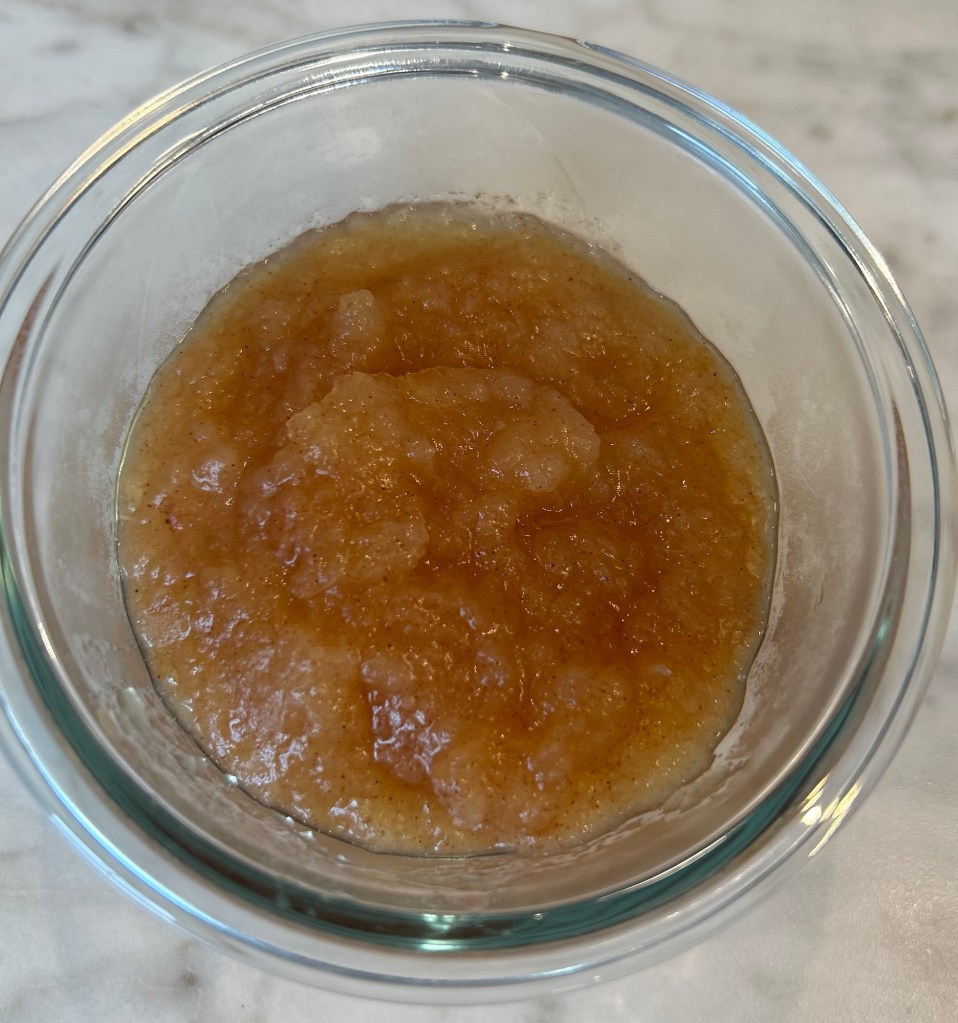
Homemade applesauce is simple, wholesome, and makes your whole kitchen smell like fall. And thanks to the Instant Pot (or Slow Cooker) it comes together in a fraction of the time. Even better? This recipe is made with no added sugar, making it a healthy, budget-friendly alternative to what you’ll find at the grocery store. Plus, it’s typically a win with picky eaters—smooth, naturally sweet, and familiar enough that kids (and adults) will happily eat it by the spoonful.

Whether you’re packing school lunches, looking for a healthier snack, or just craving something comforting, this recipe is quick, easy, and absolutely delicious.

Why I Love This Recipe đź’ź

Homemade applesauce is one of those recipes that proves simple really is best. It’s budget-friendly, naturally sweet with no added sugar, and you know exactly what’s going into it. Once you make it from scratch, you’ll never want to go back to the store-bought kind.

👉 Try this recipe out and let me know how your family likes it! Chances are, it’ll become a staple in your kitchen too—healthier, cheaper, and almost always picky-eater approved.

Ingredients

  • 3 pounds apples – about 6-7 (a mix of sweet and tart varieties works best)
  • 1 small lemon, juice of
  • ½ cup water
  • 1 teaspoon ground cinnamon (optional, but highly recommended)

Instructions

INSTANT POT:

1. Prep the apples – Peel, core, and slice the apples. (Pro tip: If you’re short on time, leave the skins on for extra fiber and color, then blend them smooth at the end.

2. Place apples in the bottom of the Instant pot, add the lemon juice, water and optional cinnamon.

3. Attach lid, and make sure vent is in the SEALED position. Push the PRESSURE COOKER button, and manually set the time for 6 minutes.

4. When done, let the steam vent on its own, takes about 6 minutes. Move the vent to open, careful not to burn yourself as there may still be steam left. Remove lid and let cool a bit,

5. Mash or puree: If cooking with the skins on, use an immersion blender right in the pot to puree the mixture, or transfer to a blender or food processor to puree until desired consistency. When cooking without the skins, you can simply mash with a potato masher or back of a fork or slotted spoon.

SLOW COOKER:

1. Add the apples to the bottom of the crockpot, add the lemon, water and optional cinnamon, and cover with lid.

2. Set the slow cooker on high for 4 hours, stirring once or twice. Let cool a few minutes, remove cinnamon stick, and mash or puree.

3. Mash or puree: If cooking with the skins on, use an immersion blender right in the pot to puree the mixture, or transfer to a blender or food processor to puree until desired consistency. When cooking without the skins, you can simply mash with a potato masher or back of a fork or slotted spoon.

    Store your applesauce in the refrigerator for up to 7 days, or freeze for up to 2 months.

    Makes 4 – 4 1/2 cups

    For ultra-smooth applesauce, use a blender to puree.

    If you prefer more sweetness, add a tad of sugar 1 – 2 teaspoons at a time until desired sweetness.

    Why I Love this Recipe

    This makes homemade applesauce incredibly easy—no babysitting a pot on the stove, no long simmering. It’s ready in under 30 minutes, naturally sweet with no added sugar, and always a hit with kids and adults alike.

    👉 Try this recipe out and let me know how your family likes it! Chances are, it’ll become a staple in your kitchen too—healthier, cheaper, and almost always picky-eater approved.

    🍫 5-Ingredient Granola Bars

    Healthy | Kid-Friendly | Freezer-Friendly

    If your kids are anything like mine, they live for granola bars. My picky eater was so hooked at one point that we had to limit her to just one a day—between the sugar and the cost, it added up fast. I went searching for a better option made with whole foods… and now we’ve got one that’s healthy, affordable, and totally customizable!

    This version is packed with protein, made from pantry staples, and has just enough chocolate to win over little snack critics like mine. 🧒🍫 Bonus? It freezes beautifully—so you can make a big batch and always have some on hand.

    Ingredients

    • 3 cups old-fashioned rolled oats (use certified gluten-free if needed
    • Âľ cup natural peanut butter*
    • â…“ cup honey or maple syrup
    • 2 whole eggs (or flax eggs for a vegan version)**
    • ½ cup mini chocolate chips (optional—but always welcome in our house!)
    • Optional add-ins: pinch of salt (omit if peanut butter is salted), chopped nuts, seeds, or dried fruit

    *Feel free to sub with another nut/seed butter if you have allergy concerns

    **1 flax egg = 1 tbsp ground flax + 2.5 tbsp water (let sit for 5 minutes)

    Instructions

    1. Preheat oven to 350°F (175°C). Line a baking dish (8×8 or similar) with parchment paper.

    2. In a large bowl, mix oats, peanut butter, honey (or syrup), and eggs until well combined.

    3. Fold in chocolate chips and any extra add-ins you like.

    4. Press mixture firmly into the prepared pan. Smooth the top with a spatula or your hands.

    5. Bake for 15–18 minutes, or until the top is golden and set.

    6. Let cool completely before slicing into bars. Store in the fridge for up to 1 week.

    đź§Š Freezer-Friendly Tips:

    1. Let bars cool and cut into individual portions

    2. Layer between parchment paper in a freezer-safe container or bag.

    3. Label and freeze for up to 3 months.

    4. To enjoy, thaw on the counter or microwave for 20–30 seconds.

    đź’¬ Tried it?

    Tried this recipe or have a picky eater win to share? I’d love to hear from you!

    📲 Tag your creations on Instagram @fromworktotable

    👩‍👧 Or join the community on Facebook: From Work to Table

    We’re all just doing our best to get good food on the table—one bite at a time.

    🎥 Watch It Come Together

    Want to see how easy these granola bars are to make?

    Come hang out in my kitchen while I whip up a batch—step by step!

    👉https://www.instagram.com/reel/DLghz_ARAk5/?igsh=aG9tNTdvYWFzZXd1

    Because sometimes seeing it made makes all the difference. 🍫✨

    🍎 Apple Cinnamon Pancakes Recipe

    Looking for a quick, healthy, and picky-eater-approved breakfast? These Apple Cinnamon Pancakes are soft, fluffy, and naturally sweetened with grated apple. They’re made with pantry staples and come together in just 15 minutes — perfect for busy school mornings or slow weekend brunches.

    đź§ľ Ingredients:

    • 1 red apple, peeled and grated
    • 1 egg
    • ½ cup flour
    • ÂĽ cup milk
    • 1 tsp baking powder
    • 1 tsp cinnamon

    👩‍🍳 Instructions:

    1. Prep the apple: Peel and grate the apple into a bowl.

    2. Mix: Add the egg and stir to combine.

    3. Add dry ingredients: Stir in flour, baking soda, and cinnamon.

    4. Pour in milk: Mix until a thick batter forms.

    5. Cook: Heat oil in a nonstick pan over medium heat. Spoon batter into the pan in small portions.

    6. Flip: Cook until edges bubble and bottoms are golden. Flip and cook the other side until done.

    đź’ˇ Mom Tips

    • Double the recipe and freeze extras for a grab-and-go weekday breakfast.
    • Add mini chocolate chips or raisins for fun, kid-friendly twists.
    • Serve with maple syrup, yogurt, or a smear of almond butter for extra flavor and protein

    đź’¬ Final Thoughts

    These Apple Cinnamon Pancakes are a cozy, comforting way to sneak fruit into your family’s morning without any complaints. They’re quick, versatile, and most importantly — kid-approved! 🙌

    If you make this recipe, tag me on Facebook or share a pic — I’d love to see your creations!From Work to Table

    🍌 5-Ingredient Banana Oat Cookies (Easy + Picky-Eater Friendly)

    These are my go-to cookies when we want something sweet, fast, and not packed with sugar or drama. With only five ingredients (plus whatever extras you have), they’re perfect for after-school snacks or “oops, I forgot it’s bake sale day” moments.

    One of my kids thinks these are basically breakfast. The other only eats them if I sprinkle sea salt and throw in chocolate chips—so of course, that’s what I do.

    Ingredients

    • 2 ripe bananas (the spottier, the better)
    • 1/2 cup peanut butter
    • 1 tsp vanilla extract
    • 1/2 cup oats (quick or rolled)
    • Chocolate chips or other add-ins (optional: raisins, chopped nuts, shredded coconut)
    • Sea salt for sprinkling (optional but delicious)

    Instructions

    1. Preheat your oven to 350°F (175°C). Line a baking sheet with parchment paper.
    2. In a bowl, mash the bananas with a fork until smooth.
    3. Stir in the peanut butter and vanilla until combined.
    4. Add oats and mix until everything comes together. Fold in chocolate chips or any extras.
    5. Scoop small spoonfuls onto the baking sheet and gently flatten. Sprinkle with sea salt if using.
    6. Bake for 12–15 minutes, or until the edges are slightly golden.
    7. Let cool for 5 minutes (or don’t—it’s your kitchen).

    Recipe Notes

    • Want them chewier? Add more oats.
    • Allergic to peanut butter? Try almond butter or sunflower seed butter.
    • These freeze well—just toss them in a zip bag after they’ve cooled.

    Prep & Cook Time

    Prep time: 5 min Cook time: 12–15 min Total time: ~20 min Makes: 10–12 cookies

    Variations

    • Add cinnamon, flaxseed, or chia for extra nutrition.
    • Turn them into “breakfast cookies” with dried fruit + coconut.
    • Use dark chocolate chunks and flaky salt for grown-up snack energy.

    Storage

    • Store in an airtight container for 3 days at room temp or 5–6 days in the fridge.
    • Freeze flat in a bag or container for up to 1 month.

    Did your picky eater approve these? (Even a nibble counts!)

    Tag me @fromworktotable or leave a comment—I’d love to see your cookie twist.

    From Work To Table